Handcarved option
+8
Smoke
joesfishinproblem
skippy
stevel
FJR
Murphthesurf
Kevnmary
ecduzitgood
12 posters
Page 1 of 1
 Handcarved option
Live herring were one of my favorite live baits for strippers but I could no longer fish them so I was looking for a herring style plug and couldn't find what I was looking for so I decided to build my own. I started with a piece of cedar stockade fence (very cheap and easy to find). The first thing I did was draw the shape I wanted and then using spry on adhesive attach the pattern onto the wood.

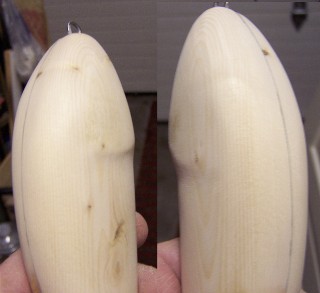
After using my scroll saw to cut the shape out this is what I have

I then sand the two pieces to shape untill I get them to match/line up

Once I am happy with the shape I router out a channel for the thru-wire and use marine epoxy to join the two halves together (make sure most of the sandidng is done around the areas where the thru-wire protrudes) and clamp overnight. Then I finish sanding to shape


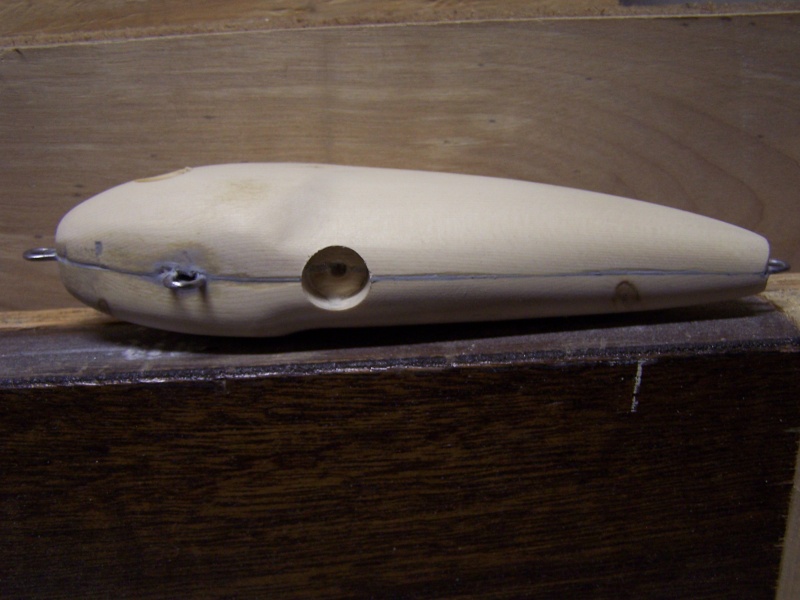
Then I drilled using a forstner bit the holes for the eyes and the magnet


It is my belief that the diggers are caused when the plug hits the water and the hook points hit the plug so i wanted to minimize hook movement without securing the hook completely.The magnet is something I am using to try and minimize the amount of damage the belly hook does to the finish and I feel having the hook sit the way it does makes for a more realistic appearence (kind of like fins as opposed to a hanging hook). I install the magnet using epoxy and minor sanding to shape. Next I seal the plug with minwax wood hardner (read the cautions on can). I test how the plug floats and install weight untill I am happy with how it sits in water filling each hole with epoxy (This can be time consuming but I want to weight the plug like I would weight a real makeral or bluefish for trolling for Bluefin tuna thus eliminating the lip, once again for a more natural appearence).

Once I am happy with how the plug is balanced I scuff the plug with 220 grit to promote adhesion and prime the plug (I use Krylon spry can for primer and basecoat color once again read the can)

Then I wet sand the primer (360 grit wet/dry) and apply my base color (flat black for this plug)

Next I scuff the base color 400 wet and apply etex sealer (spraycan sealer 3-4 light coats read the can warnings) and scuff again using 400 grit wet and apply the scales using mesh/netting taping the head so it is not painted using acrylic metalic perl white paint thinned to spray using my airbrush and apply a light coat/coats

After I am happy with the scales I seal this caot using the etex spray can sealer and scuff lightly with 400 wet and a 3m scuff pad (grey) and hand paint the head area using the same metalic pearl white

Once again I seal this with the etex 2-3 coats and scuff again using a 3m scuff pad and then apply the metalic white pearl thinned in light coats till I have the right amount of the scales showing through (I tape the upper area with painters tape low tack or drag the blue tape accroos you pants a couple of times to eliminate some of the stickiness)

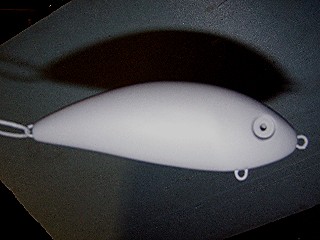
Then I seal this with etex sealer scuff with 3m scuff pad and install the eyes withe epoxy and attach to my spinner and coat with Envirotex lite (When I built this plug I was not able to finish because of the weather so I am using a photo of my first plug)

I will go over how I made the eyes later.

After using my scroll saw to cut the shape out this is what I have

I then sand the two pieces to shape untill I get them to match/line up


Once I am happy with the shape I router out a channel for the thru-wire and use marine epoxy to join the two halves together (make sure most of the sandidng is done around the areas where the thru-wire protrudes) and clamp overnight. Then I finish sanding to shape


Then I drilled using a forstner bit the holes for the eyes and the magnet


It is my belief that the diggers are caused when the plug hits the water and the hook points hit the plug so i wanted to minimize hook movement without securing the hook completely.The magnet is something I am using to try and minimize the amount of damage the belly hook does to the finish and I feel having the hook sit the way it does makes for a more realistic appearence (kind of like fins as opposed to a hanging hook). I install the magnet using epoxy and minor sanding to shape. Next I seal the plug with minwax wood hardner (read the cautions on can). I test how the plug floats and install weight untill I am happy with how it sits in water filling each hole with epoxy (This can be time consuming but I want to weight the plug like I would weight a real makeral or bluefish for trolling for Bluefin tuna thus eliminating the lip, once again for a more natural appearence).

Once I am happy with how the plug is balanced I scuff the plug with 220 grit to promote adhesion and prime the plug (I use Krylon spry can for primer and basecoat color once again read the can)

Then I wet sand the primer (360 grit wet/dry) and apply my base color (flat black for this plug)

Next I scuff the base color 400 wet and apply etex sealer (spraycan sealer 3-4 light coats read the can warnings) and scuff again using 400 grit wet and apply the scales using mesh/netting taping the head so it is not painted using acrylic metalic perl white paint thinned to spray using my airbrush and apply a light coat/coats

After I am happy with the scales I seal this caot using the etex spray can sealer and scuff lightly with 400 wet and a 3m scuff pad (grey) and hand paint the head area using the same metalic pearl white

Once again I seal this with the etex 2-3 coats and scuff again using a 3m scuff pad and then apply the metalic white pearl thinned in light coats till I have the right amount of the scales showing through (I tape the upper area with painters tape low tack or drag the blue tape accroos you pants a couple of times to eliminate some of the stickiness)

Then I seal this with etex sealer scuff with 3m scuff pad and install the eyes withe epoxy and attach to my spinner and coat with Envirotex lite (When I built this plug I was not able to finish because of the weather so I am using a photo of my first plug)

I will go over how I made the eyes later.
ecduzitgood- Number of posts : 31
 Re: Handcarved option
Very cool EC. I love the shape of this it almost has the shape of a Goldeneye maverick (without the lip obviously) have you tried to design it with a lip? What's the finished weight on that baby and how does it swim?

Kevnmary- Number of posts : 2417
 Re: Handcarved option
I will have to put it on a scale again since I don't remember but I think it was 3.6 oz. I designed it to look like a cotton cordell big-o I used to have and lost after one cast. The whole idea was to just cast it to breaking fish and move it slow if at all and give it a few twitches. I did find that it swims with a slow side to side wobble just like a dead bluefish rigged for tuna (weight located on the chin/lower jaw) I don't see any need for the lip due to the weighting placement. It does swim and has caught for me so I know the lip isn't necessary. Although if I did design it with a lip the weighting would alot easier almost foolproof (just low in the belly slightly foward). But I didn't want the lip for times when the plug is standing still and a big girl with years of experience was looking at it just sitting there and then twitch...bang (haven't you ever had a bass hit when the plug was not moving?). Lot's of people feel it's necessary but if you weight it right there is no need for the lip it will swim properly. I originally had the hook positioned so they were on either side of the body but have decided to flip the hook over and the hook set ratio increased. This photo shows how the magnet held the hook (trebble with one hook removed)

This is after I changed the hook position and fished it all summer with minimal damage to the plugs finish (this is the plug featured in the build from above)


This is after I changed the hook position and fished it all summer with minimal damage to the plugs finish (this is the plug featured in the build from above)

ecduzitgood- Number of posts : 31
 Re: Handcarved option
Excellent job, like the fact there isn't any lip.

FJR- S.B.O DONATING MEMBER

- Number of posts : 1577
 Re: Handcarved option
great job ...looks fantastic .... 


stevel- S.B.O DONATING MEMBER

- Number of posts : 5196
 Re: Handcarved option
Now without a doubt thats sick. I like the step by step. Very insane. I for one am a big fan of the Big O. Hope you murder them with it,
charlibonz- Number of posts : 55
 Similar topics
» MY FIRST HANDCARVED
» small handcarved
» my first handcarved swimmer
» handcarved swimbait
» Handcarved Surfsters
» small handcarved
» my first handcarved swimmer
» handcarved swimbait
» Handcarved Surfsters
Page 1 of 1
Permissions in this forum:
You cannot reply to topics in this forum


» Here is your new member from NJ.
» Greetings from the west coast.
» Newbie here
» Cooler Rack for front of truck
» "Purple Heron"
» Another Classic Conversion
» A BAKERS DOZ !
» WINTERS OVER !
» Classic Conversion !